Appearance
Getting started
Open the Studio
Serve the repo over HTTP (the importmap + vendored modules need real HTTP, not file://) and open the Studio:
bash
# from the repo root
python3 -m http.server 8800
# then open:
#   http://localhost:8800/web_demo/studio/index.html
Your first analysis
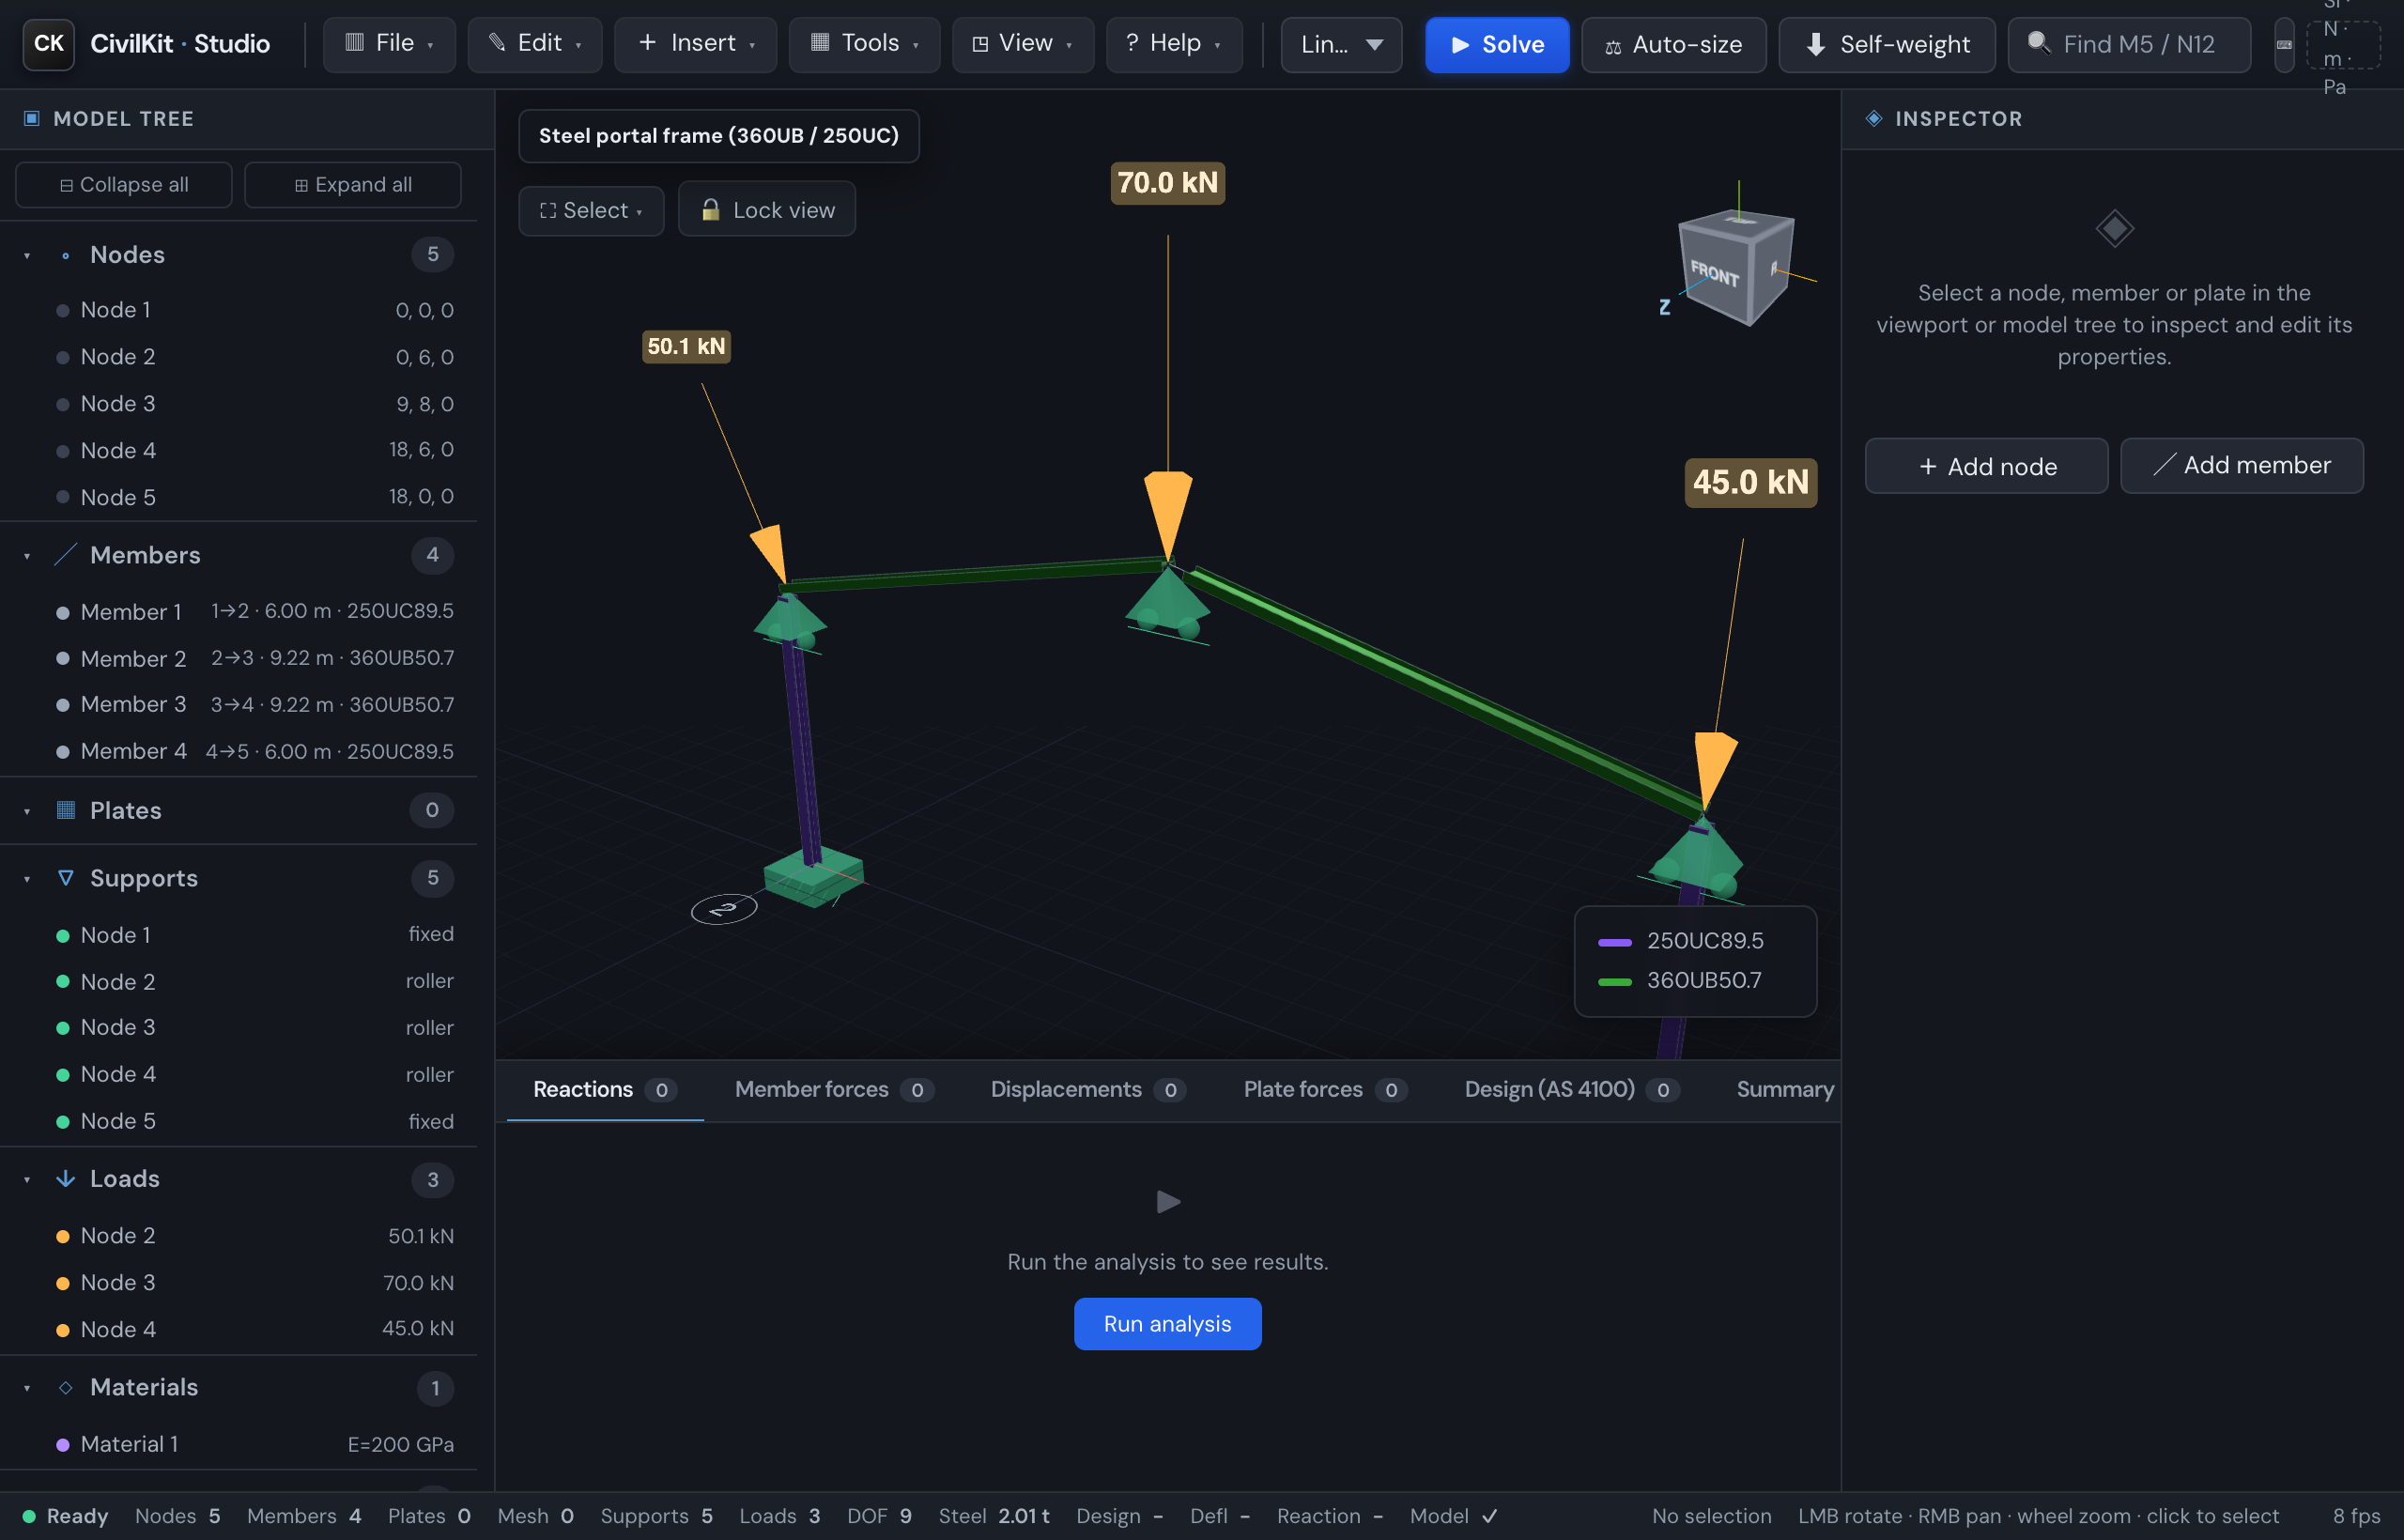
- Pick a model from the gallery dropdown (e.g. Steel portal), or New model from the File menu.
- Choose an analysis type in the selector next to Solve (default Linear static).
- Solve (
S). Results populate the bottom panel and the deformed shape + contour appear. - Inspect: click a member or node (in the viewport, the model tree, or a results row) to see its properties - and, for a member, its N/V/M diagrams.
Start a model
You rarely start from a blank canvas. The fastest paths are:
- Generate a structure - File → Generate structure builds a parametric structure with real catalogue sections, ready to solve: a continuous beam, portal frame, truss, building frame, floor grid, arch, lattice tower or dome. See Structure templates.
- Open a gallery model and edit it.
- New model and build it up: add nodes and members, assign sections & materials, set supports, and apply loads per load case.
Orientation matters
A horizontal I-beam under gravity must be web-vertical to use its strong axis. Set the member's β angle to 90° for a floor beam, or the deflection will be many times too large. This is the most common modelling mistake - see Member orientation.
Pre-solve sanity check
When you solve, Studio first runs a non-blocking sanity check and surfaces common modelling mistakes in the log (and a toast) with a plain-English reason - before running:
- no supports (a rigid-body mechanism that will not solve);
- members referencing a missing node / section / material;
- zero-length members (coincident end nodes);
- sections with zero / negative area or no second moment of area;
- nodes connected to nothing (orphans);
- no loads (the analysis would return zero).
It explains, it does not gatekeep - so you still get the "why won't my model solve?" answer up front.
Handy keys
| Key | Action |
|---|---|
S | Solve |
1–4 | Iso / Top / Front / Side views · F Fit |
O / P / D | Toggle nodes / supports / loads |
X / A | Isolate selection / Show all |
L / G | Toggle labels / dimensions · B Light background |
[ ] \ | Toggle the left / right / bottom panels |
Ctrl/⌘ K | Command palette (any action, or jump to a node/member id) |
? | Keyboard shortcuts |
Selecting elements
Click a member, node or plate to select it (it frames in the 3D view and opens in the inspector). Click empty space to deselect.
Shift / Ctrl-click adds to a multi-selection. A floating bulk-action bar appears so you can change the section, set end fixity, add a UDL, isolate or delete the whole set at once. The Section dropdown's + Catalogue… entry assigns a steel profile straight from the catalogue to every selected member.
The Select button (top-left of the viewport) opens the region-select tools:
- Box select - drag a rectangle; everything inside is selected.
- Lasso - drag a freehand outline for irregular groups.
- Front only (on by default) - skips elements hidden behind nearer geometry, so a box/lasso over a 3D frame grabs the near face, not the frame behind it. Turn it off to select through the whole depth.
Orbit is disabled while a region mode is on (the drag draws the shape); Shift adds to the current set, and Esc exits the mode.
Every selection tool is also in the command palette (
Ctrl/Cmd K) - type "box", "lasso" or "front", or a node/member id (e.g.m12) to jump straight to it.
Measure distances
View → Measure distance, then click two nodes to read the straight-line distance between them plus the X/Y/Z components, shown in the status bar with a marked line in the 3D view. Keep clicking to measure node-to-node along a path; press Esc to exit. It's a read-only check - it never changes the model.
Command palette
Press Ctrl/Cmd + K to open the command palette: type to fuzzy-find any action - Solve, Auto-size, Load combinations, Save image, Measure, camera views, panel toggles - and press Enter to run it. The fastest way to reach anything without hunting through menus.
Language
Settings ▸ Language switches the interface language. The whole UI - including the full inspectors - is localised through a locale framework, with English (base) plus Spanish, Thai and Dutch; any untranslated string falls back to English. Your choice is saved in the browser and applied on every visit. Engineering symbols and units stay language-neutral.