Appearance
Analysis & results
Analysis types
Choose from the selector beside Solve:
| Type | What it does | Result |
|---|---|---|
| Linear static | First-order elastic analysis | Displacements, reactions, member + plate forces |
| P-Delta | Second-order (geometric stiffness) | Same as static, with second-order effects |
| Buckling | Elastic buckling eigenvalue | Critical load factors + buckling mode shapes |
| Modal | Free-vibration eigenvalue | Natural frequencies (Hz) + mode shapes |
For buckling and modal, set the number of modes. P-Delta exposes iteration limit and convergence tolerance. Your choice persists across a refresh.
Nonlinear analysis (large displacement, plastic, cables)
Tools › Nonlinear analysis… runs a load-stepped geometrically nonlinear solve and draws the load-displacement curve for the most-displaced node. Options in the panel:
- Material - elastic, or plastic fibre: the section is divided into fibres with a yield stress fy (from the material, or typed) so hinges form and spread. Twisting stays elastic in the plastic analysis, and the result says so.
- Control - load steps (the load factor λ climbs to 1.0 in the number of steps you set), or arc-length, which traces past a limit point into snap-through or a collapse mechanism. Arc-length is for flat (planar) frames only and is refused by name on a three-dimensional model rather than approximated.
- Cables - a member typed Cable with the catenary model is solved as a true catenary here; the panel lists each cable's sag, horizontal tension H and end tension T max at the last converged step. See Modelling › Cables.
The readout names how the path ended: limit point at λ = … or collapse mechanism at λ = …, with the control node, the peak displacement and the steps taken. A refusal (no fy, an unsupported case) is shown inside the panel so a changed option can be tried at once. Every path in this panel is checked against closed forms and OpenSees; the table is in Verification › Nonlinear analysis.
Storey drift
Tools › Storey drift… lists, for a solved multi-storey model, each level's lateral movement, the inter-storey drift and its ratio (1/N), plus the storey shear from the active case's lateral loads. Storeys are read from the node heights.
When the active case (or a combination containing one) is typed Seismic (Eu), the panel also grades the AS 1170.4:2024 design storey drift: the elastic drift is scaled by μ/Sp for the project's structural system (Cl 6.7.2, Eq 6.7(1); μ and Sp from Table 6.5 via the Design criteria), and each storey's dst is checked against 1.5 % of the storey height (Cl 5.4.4). The note under the table states the factors used. Cl 6.7.3 P-delta amplification is not applied by the panel; run the P-Delta analysis type for second-order effects. Under wind or any other case the panel is a plain readout against whatever limit you apply (Table C1's column and portal rows are checked on the design panel).
Advanced solver options
Settings ▸ Solver exposes finer control over the analysis. These are feature-detected against the WASM build, so an option only appears when the loaded solver supports it:
- Member evaluation points - stations per member (default 11). More stations give a finer force-diagram resolution along each member (and finer continuous-member span splitting); fewer solve a touch faster.
- Smooth plate results - average / extrapolate plate nodal stresses for smoother contours instead of raw per-element values.
- Consistent mass matrix (modal) - use a consistent mass matrix rather than the default lumped matrix for modal analysis (affects the natural frequencies).
- Building slenderness check (h/300) - after a static solve, compare the overall sway against the h/300 limit and report the ratio (e.g. 1/420 OK) in the log, naming the governing node.
Your choices persist across a refresh.
Model size
Studio solves entirely in your browser. Small models use a direct dense solve; larger ones (above ~800 free DOFs) switch to a fill-reduced (RCM-ordered) sparse solver that scales to tens of thousands of DOFs - a 2,880-plate dome (~17,700 DOFs) solves in a few seconds. Above ~20,000 free DOFs Studio asks for confirmation first, since a very large solve keeps the browser tab busy while it runs.
Reading results
The bottom panel has tabs:
- Reactions - support reactions (kN, kN·m), with a per-axis equilibrium check (ΣR + applied ΣF ≈ 0) on each loaded axis - vertical (Z), plus horizontal (X) and (Y) for laterally- or out-of-plane-loaded 3-D models - to confirm the solve balances at a glance.
- Member forces - end forces per member (kN, kN·m).
- Displacements - nodal translations (mm) and rotations (mrad).
- Plate forces - membrane stresses (MPa) and bending moments (kN·m/m), plus Wood-Armer design moments in the plate inspector.
- Summary - max displacement, Σ reactions, applied load, max moment, and an equilibrium check.
- Diagnostics - every reason to doubt this solve, one row each. See below.
Clicking a results row selects that node/member/plate in the 3D view.
Compare: one case minus another
The Compare picker sits beside the load-case picker after a solve. Choose a second case and the model shows the difference - every member force, station force, displacement, reaction and plate result under the active case minus the same quantity under the other one - painted by the same colour maps, diagrams and labels the real cases use.
It answers a question the Compare tab cannot: not "what are the numbers", which two columns show, but where in this frame does the wind case actually change anything, which is a question about the structure and is answered by looking at it.
Three things it deliberately does not do:
- It is not a load case. It has no applied load of its own, so its reactions balance nothing and it cannot be designed against.
- It carries no capacities. A capacity is a property of the section; the difference of two identical capacities is zero, which would paint every member as having no strength at all. A utilisation is a ratio, and the difference of two ratios is not the ratio of the difference.
- The envelope is not offered as a comparison. Its value at one member can come from one combination and at the next member from another, so subtracting it produces a field that is not the difference of anything.
A member the solver reported in one case and not the other is left out rather than differenced against zero - "not reported here" and "carries none of it here" are different statements.
Diagnostics: every reason to doubt the solve
A solve that finishes is not the same as a solve you can rely on, and most of the ways it can be unreliable leave no mark on the numbers themselves. The Diagnostics tab lists them, and the badge on the tab counts them.
Each row carries a severity, and the severity is a claim about the numbers rather than about tidiness:
| means | |
|---|---|
| Wrong | a result on this model is wrong, not merely uncertain |
| Uncertain | the solver answered a slightly different question than the one you think you asked, or a region is too soft to lean on |
| Note | a fact about the run, with nothing wrong |
What it checks
- The model does not validate. Results from a model that does not validate mean nothing.
- Members solved as something else. Cable and spring members are not modelled by this solver and fall through to an ordinary beam - so a cable carries bending and compression it physically cannot. These only ever arrive by import; the editor does not offer them. Reported as Wrong.
- Tension- and compression-only members solved two-way. Under Static and P-Delta they are solved as ordinary linear members, so a compression-only brace can carry tension. Run the dedicated T/C-only analysis to deactivate them in the wrong sense.
- Degrees of freedom the solver restrained. These had no stiffness, so the solver restrained them to make the system solvable. Often harmless - an unused rotation on a pin-ended truss - but it is also exactly what a missing restraint or a disconnected member looks like.
- Near-singular degrees of freedom. The stiffness there is small enough that the displacement is dominated by round-off. The solve completed; those results should not be leaned on.
- Loads that did nothing. A load sitting on a degree of freedom the solver had to restrain is carried by that added restraint and not by the structure. The model goes from "singular, investigate" to "solves, but my load did nothing", and every member force downstream reads zero for a reason nothing else on screen states. Reported as Wrong, naming the node and the component.
- Self weight the analysis does not carry. A load case can declare a self-weight factor that never reaches the solver - an imported file's does. The row names the cases and points at the self-weight toggle, which creates the member loads the solver actually reads.
- Reactions that do not balance the applied load. Σ applied + Σ reactions should be zero on every axis of every load case. An imbalance means the solve did not answer the problem that was posed: suspect a load that never reached a member, or a restraint that is not where it is drawn. Checked per load case, not per combination - a combination's applied load is a factored sum, and comparing it against a case's would report a false imbalance on every model that has combinations.
An empty panel says how many checks ran
"Nothing fired" and "nothing was checked" are different statements, and a panel that cannot tell you which is not worth reading. A clean model reports the number of checks that looked and what each of them looked for.
From a script or an agent
CivilKit.diagnostics() returns the same rows, and the MCP tool diagnostics returns them to an agent - so a script's "the model solved clean" means what the panel means. It also still carries the four counts it always had (autoRestrained, conditioning, tcOnlyLinear, unmodelled, clean), so anything written against those keeps working.
Visualising results
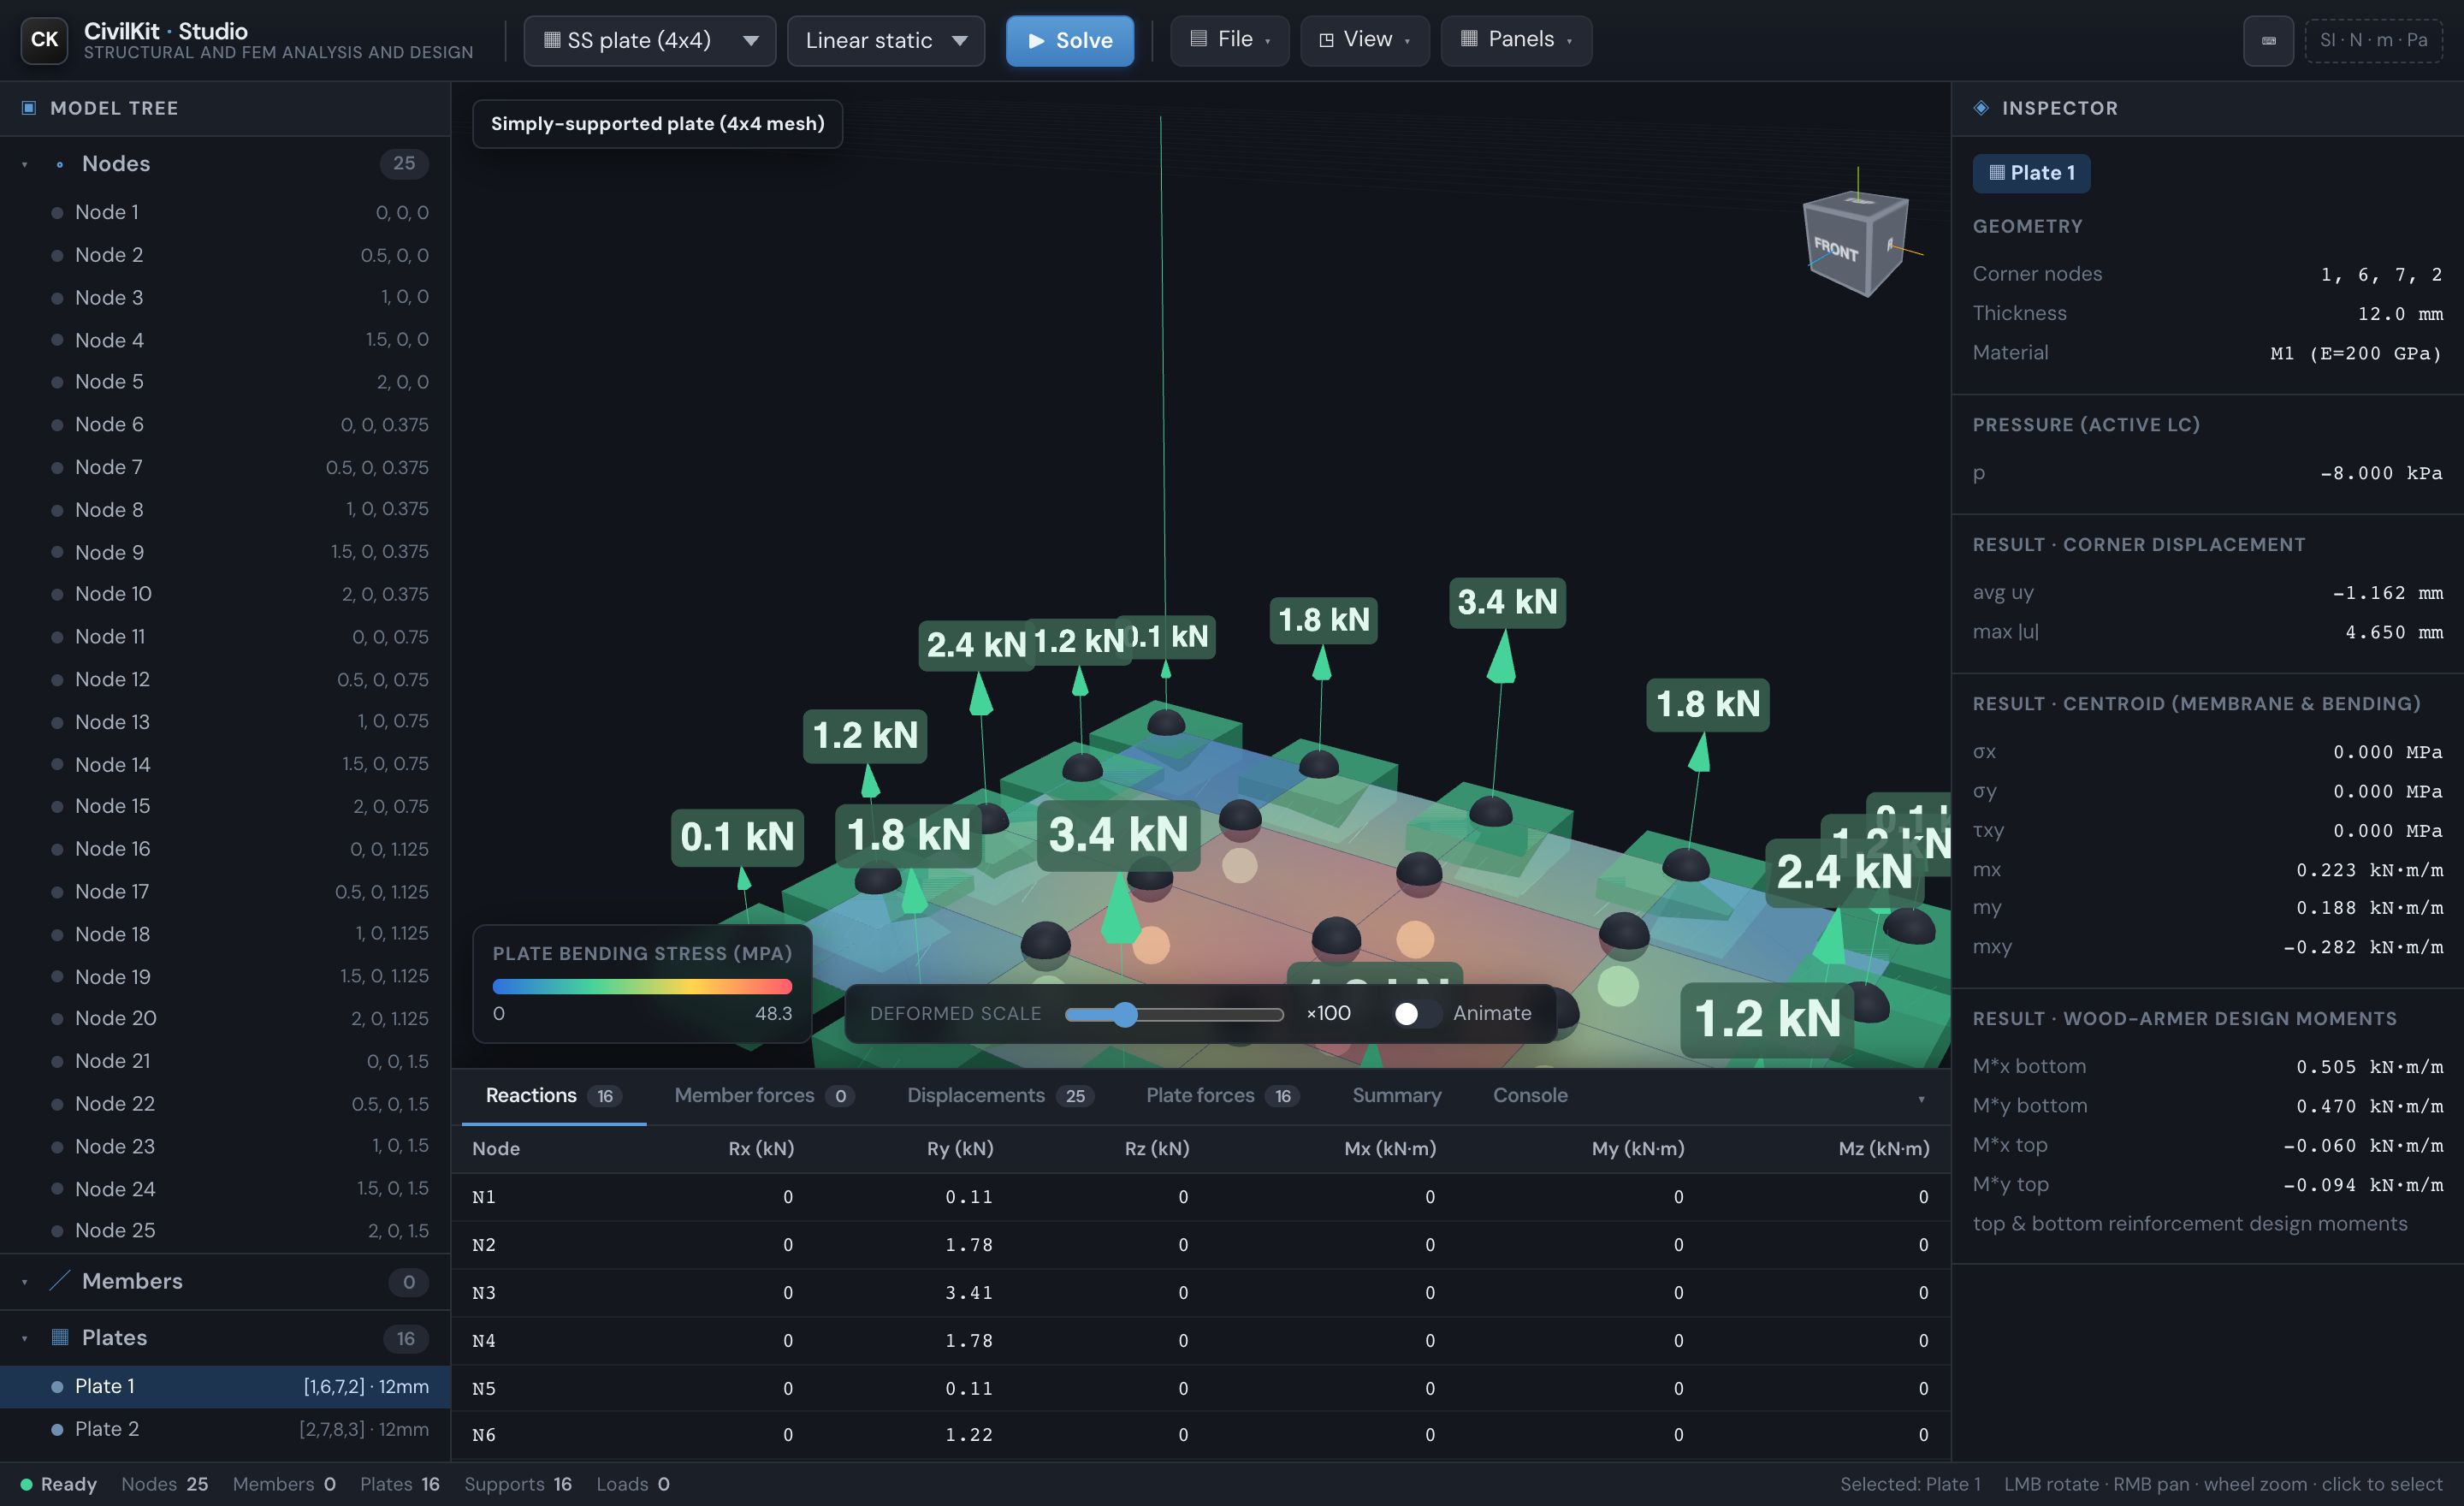
- Deflection contour - after solving, the model is coloured by displacement magnitude (legend bottom-left). Plate-only models show a bending-stress contour instead (shown above).
- Deformed shape - scale slider + Animate toggle. For buckling/modal, the mode shapes animate.
- Member force diagrams - select a member to see N / V / M diagrams along it in the inspector.
- Reaction arrows at the supports.
Inspector readouts
Select any element (in the viewport, the model tree, or a results row) and the right-hand inspector shows its properties and its solved results:
- Node - coordinates, restraints and applied load (editable); after solving, its displacement (ux/uy/uz, |u|) and, for a support, its reaction (Rx/Ry/Rz, Mx/My/Mz in kN/kN·m).
- Member - connectivity, type, material, section, β angle; after solving, its end forces and N / V / M force diagrams plotted along the member.
- Plate - geometry, thickness, material, pressure; after solving, centroid membrane stresses and bending moments, plus Wood-Armer design moments (top/bottom reinforcement).
Show / hide & focus
Declutter the model with the View menu or shortcuts: toggle nodes (O), supports (P), loads (D), members and plates; Isolate selection (X) hides everything but the selected element; Show all (A) restores it.
Units
On-screen results use engineering units (kN, kN·m, mm). The underlying solver and the JSON API use SI (N, m, Pa, rad) - see the API reference. A configurable metric / imperial display is on the roadmap.
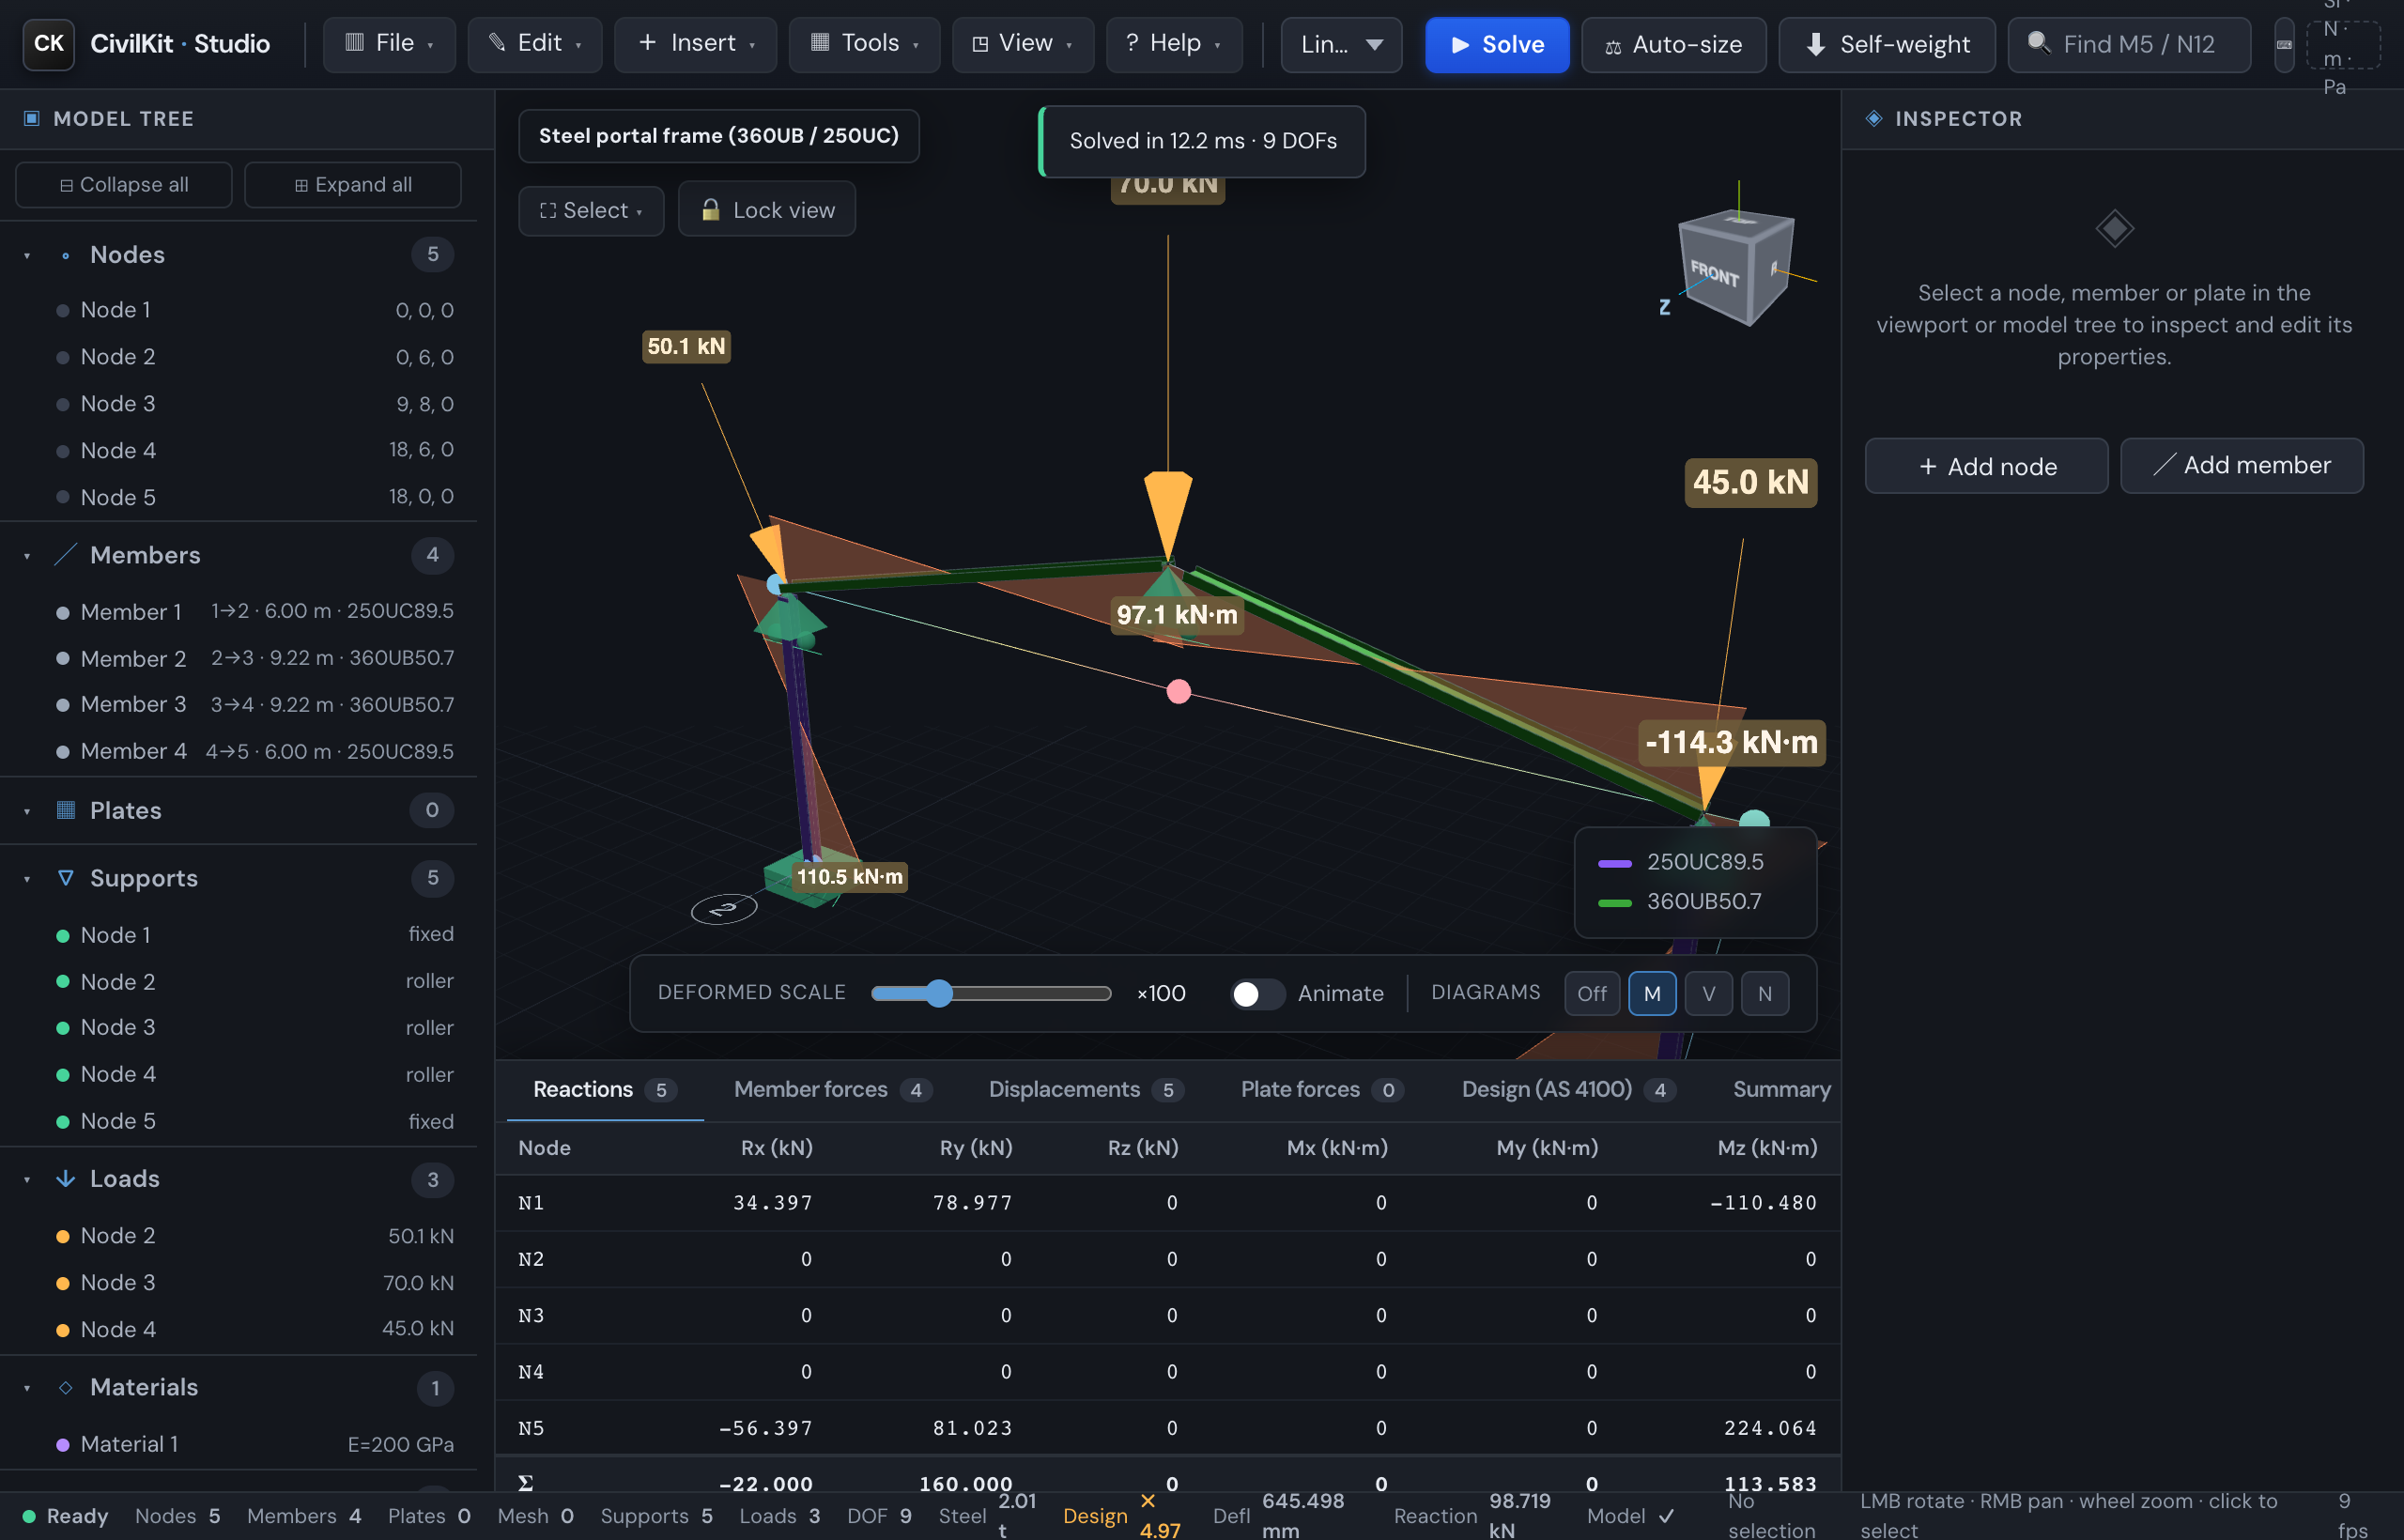
Force diagrams (BMD / SFD / AFD)
After solving, the Diagrams control in the deformed-view panel overlays member force diagrams directly on the 3D model: M (bending moment), V (shear) or N (axial), drawn from the per-station member forces in each member's bending plane and scaled to a common maximum. Pick a load case or Σ combination and the diagrams follow. Select a member to read its exact M/V/N mini-diagrams in the inspector.
Save a view as an image
File → Save image (PNG) downloads the current 3D viewport - including whatever is shown (deformed shape, force diagrams, utilisation contour) - as a PNG, ready to drop into a calculation package, report or email.